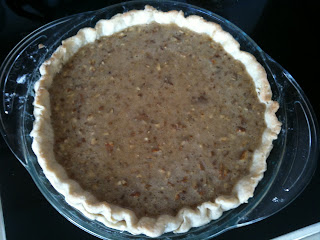
Man, just the sound of this pie sounds good.
Let me preface this blog by saying that while I was making this particular pie, I was also making lunch for me and a separate lunch for the boys. I had many things going on all at once and I knew that it would be crazy; but, I know now not to attempt that again. Things seemed really rushed, but no worries, the pie turned out great.
This time I used the food processor for making the pie crust, to save time. In the mist of the craziness I skipped a step when adding ingredients to the food processor. Per the book “Pie” by Ken Haedrich, you are supposed to put in the flour, sugar and salt and then mix and then fluff. Then add the butter and then fluff again. Well… I missed that last part. I put the shortening in first then the butter. I am not sure it made a difference; but, I did notice there were clumps of butter when getting the dough ready to set. Note to self: Follow directions exactly and don’t skip steps.
This was yet another prebake pie crust but since I just did one a few days ago it was fresh on my mind and I knew what needed to be done. Except one step… there is one last step that is very important that I did not follow to a “T”. When you take the prebaked pie crust out of the oven after cooking it for 20 minutes, you are supposed to cover just the holes with egg whites. Well, I was in a hurry so I covered the entire crust with egg whites. You might wonder what the big deal is but you will find out later.
Now, the biggest part of this pie was browning the butter. You need a shiny pan to do this, so, I had to order a shiny pan first. The “special” shiny pan is supposed to make it easier to tell the color of the butter as it browns, it's harder to tell how it's doing in a dark pan. Browning the butter was an important step, and if you mess that up it will mess up the whole pie. I don’t know about you, but I have never browned butter before. They are right that once the browning starts you have to work FAST. I am happy to report that my first attempt to brown butter was a success. After browning the butter I set it aside to let it cool. I then added all the ingredients to it and then ran into a hiccup. It called for 1/8 teaspoon of vanilla extract. I did not know they made that little of a measuring spoon. So, thanks to the advice of my Mom, I just filled the 1/4 teaspoon halfway and there you have it, 1/8 teaspoon. Who knew you would get a math lesson from me. I finished making the filling, and boy did it smell good!
The pie took a little longer to cook than it said it would, maybe 10 minutes more. Per the book, the filling should crack at the sides and puff a little at the top. Looks like it turned out just right.
After letting it set for over two hours, Joshua cut the pie and it was hard to cut. Of course, me being the “crust master” that I am [sarcastic], I just knew he was cutting it wrong. If you recall, earlier in this blog I talk about adding the egg whites to the entire crust, well yeah, the egg whites made the crust a “little” tough to cut. Lesson learned with that little oops.
Hello Results: Over all, it turned out really great. It tasted a little “sticky” because of the egg whites on the crust. So, don’t be in a hurry when making the crust. Try not to make a lunch for yourself and two hungry toddlers at the same time. Buy a 1/8 teaspoon measuring spoon. 294 to go!


