My email is krizty.hansen@gmail.com or hellorockinpies@gmail.com
If you don't have my cell you can email me and I will get that to you.. Thanks!
Saturday, December 17, 2011

Pies Pies Pies Pies
So it has been a while since I have updated my blog.
Hello Rockin’ Pies is ready for your order!
I started my pie journey about 1 year ago and have enough experience under my apron to confidently deliver my delicious homemade pies to all of you! I use only the best ingredients and take my time to make a wonderful assortment of fantastic fresh pies!
I’m taking orders immediately, and can have pies ready the day after you order them, or for any future date (if I’m in townJ). If you live in McKinney area, I can deliver them to you fresh from the oven. Call, text or email your order now!
Feel free to pass this along to anyone that you think might be interested in some rockin’ pies! I have pictures on my Facebook Page Hello Rockin Pies. Here are the pies I am currently selling feel free to contact me via email/blog/FB/cell.
Here are the pies that are currently available: *
| Hello Rockin Pies | |
| Specialty Pie | |
| Jimmy's Lemon Meringue Pie | |
| Duder's Key Lime Pie | |
| C.A.P (Caramel, Apple, Pecan) Pie | |
| Fresh Fruit Pie | |
| GG's Blueberry Neat Top Pie | |
| Sweetie's Sweet Potato Pie | |
| Livy's Legendary Pumpkin Pie | |
| Ice Box Pie | |
| Lummox Creamscile Ice Cream Pie | |
| Chocolate Cream Pie | |
| Chocolate Sheri Smore Ice Cream Pie | |
| Frozen White Sweetie Pie with Raspberry Sauce | |
| Pecan Pie | |
| Momma's Brown Butter Pecan Pie | |
| Zombie (Chocolate Turtle) Pie | |
| Jacks Kisses Pecan Pie | |
| Chocolate Pie | |
| Triple Addictive Pumpkin-Chocolate Pie | |
| Three C's (Chocolate Custard- Cream Cheese) Pie | |
| Glam Chocolate Chess Pie | |
*The pies can be precut upon request.
Monday, August 29, 2011
Pie #12: Peach Preserves and Applesauce Strudel Pie
So when you think of pie don’t you usually think of something round in a pie plate? Yeah I know so do I! Well in this case I did not use a pie plate instead I used a cookie sheet. Before I go into how I made it I will say I was really busy that morning (it was the morning of our Annual Easter Egg hunt at church). I am not sure what I was thinking to bake this for breakfast but I did. I do that sometimes, thinking, “Oh, I got time so hey let’s make a pie!”
This pie called for a tender Cream Cheese Pasty crust. This type of crust was hard for me to work with. I prepped the crust a day before knowing that it needed to harden up. I let it set in the fridge for a day and overnight and the dough was still sticky. While working with the dough, I found out that the heat in the kitchen made the dough stickier and the kitchen was warm from the oven warming it up. I tried to roll out the dough in a nice rectangle but the dough kept sticking to the roller, so I ended up having to pound it out like play doh. I did figure out that you need to work fast with this particular type of crust, I found this out real quick.
Now here is the cool thing, the filling is only two things: 1 cup of peach preserves and ½ a cup of sweetened applesauce. That’s IT just two ingredients. If I could get the crust down I would be able to make this in a snap. After pounding out the dough to a so called rectangle I spread the ingredients over half of the dough and then folded it over, it ended up looking like a calzone.

So the recipe says to heat the oven to 400, but then it says to turn it down to 375, well I was readying this AFTER I put it in the oven. So I had to rush over there and turn it down to 375, so it was saved. Once again, read the entire recipe more than once all the way through. Someday I will be heeding my own advice. READ ALL THE RECIPE BEFORE YOU START!
As you see below it was not one of my best looking “pies” but it tasted pretty good.


Hello Results: Cream cheese crust is a hard curst to make but the taste is well worth it. I ate a lot of it and Joshua enjoyed the rest. I would fix this again if I could get the hang of the crust. Brings a quote to mind.. “If at first you don’t succeeded try, try again.” That really rings true in this case…. 288 pies to go!
Pie 11: Bev's Brownie Pie
When I read this title of a pie I was hooked without even reading the ingredients, who would not want a pie that had the word brownie in it, I mean come on… but I was curious of one thing who is Bev? Well Bev is the name of Ken Haedrich, the author’s, wife. Apparently she has a real weakness for rich brownies. Call me sappy but I think that would be the coolest thing to have your hubby name a pie after you, to me that is a top honor.
I had the privilege of making this pie with a dear friend of mine, Jessica Ihams. My family and her family got together at their house, as we made the pie the guys grilled out hamburgers. It was a great time; all I really did was the crust on this pie. Jessica did most of the filling and did this wonderfully.
One thing I figured out after the fact was that this particular crust we were NOT supposes pre bake, all we needed to do was refrigerate the pie crust till the filling was ready. The crust was a Graham Cracker Crust, and I will say this is one of the easy crusts with little effort. Like I have said in many blogs before, it is crucial to read all the instructions FIRST then start making the pie. I know someday I will learn this lesson.
As for the filling it was pretty easy. I got to use my double boiler, which I love by the way, to melt the chocolate. The rest of the filling was pretty easy, I am glad Jessica had standing mixer, because there was a lot of mixing to be done. One interesting thing about this pie is that after we poured the filling it called for confectioners’ sugar to be put on top. Jessica and I both thought it would sink in the filling while baking. After taking the pie out of the oven the sugar was still on top.

After letting it sit out for about 45 minutes, we could not take it any longer we had to dig in.

Let me just tell you it was some brownie goodness. It was amazing; it tasted great with ice cream too! It was rich warm and like a dazzling brownie in a pie plate.
Hello Results: I loved to be able to use a double boiler that is a GREAT invention for sure. I think we could have waiting a tad bit longer to cut into the pie, but it was just too hard to wait. Again it would be a great idea to read all the instructions before starting the pie. Now this would be a fabulous idea, someday I will learn, someday I will learn. So yeah, 11 pies down and 289 to go!
Pie #10: Rockin Apple Pie
Okay so pie 10! I wanted to make a pie but did not want to go the store, so off I went into the kitchen to see what I could find. Lucky me I found some apples and some yummy spices.

So introducing Rockin Apple Pie, why the name, well I did not go by a recipe at all, I “created” it all by myself. So what better name than Rockin Apple Pie! Right?
In this pie I made a Basic Flakey Pie Double crust, without looking at the recipe, seems I have this pie crust down. See below for the bottom crust.

You may be wondering why there is so much over hang on the bottom crust. Well let me enlighten you. The reason why is, you want to have and overhang so you can attach the top crust later, allowing for some room to mess with the crust allowing you to have what they call an Upstanding Ridge crust if you would like.
After this I peeled some Gala apples and put in some sugar and corn starch and cinnamon and then the apples; then pouring the mixture in the pie dish.

After that I rolled out the top crust and put the top crust on, spread some milk over the top of the pie crust (this helps you get a good browning on top of the crust), then sprinkled some sugar on top. Since I had some wiggle room with the crust I decided to use what I will call the fork technique. To do this, you use a fork, (imagine that), with the fork you go around the edge of the curst and press the fork into the crust, this makes for a cool design; I will refer to as the fork print.

Then I put the pie in the oven for 30-45 minutes. While the pie was in the oven I used the left over crust to make some cinnamon and sugar squares. These squares remind me of home. How my mom use to make them, oh the memories… Oh, these squares were a huge hit with my boys.

After the pie was in the oven for about 45 minutes I took it out and let it set for a while.

Was there an occasions for this pie? Funny you should ask that, actually. I did this pie for a Woman’s Bible study; I was supposed to bring a dessert that night. So I thought I would surprise them with a homemade apple pie. Well as it turns out the meeting was cancelled and Joshua and the boys and I got to eat some yummo pie. So that worked out for our favor for sure!

Hello Results: I would have loved to share this pie with my gal pals but I know there will be another chance to do so. My boys, including my hubby, loved the pie and the cinnamon sugar squares. I strive to get to the point where I can walk in a kitchen and put some things in a pie crust and say … “There you go, the best pie you will ever have!” What can I say I dream BIG.
10 pies down and 290 to go!
Monday, August 8, 2011
Update on my Pie Blogs
Some of you have been inquiring about my pie making and if I am still making pies. And I hope you are checking in every once in a while. Things have been crazy around here, I am still making pies, but the blogs are not getting done as fast as I would like to. My goal is to get them up really soon! I am working on getting the blogs up within two weeks. Stay tuned, thanks for checking in!
Wednesday, April 20, 2011
Pie #9: Frozen White Chocolate Pie with Raspberry Sauce
Just the name of this pie has my mouth watering and the funny thing is that I’m not the biggest fan of raspberries. So, once again, I did this pie in a rush. So much of a rush that I made it during my lunch break, which I would not suggest. I was kind of on edge with the time crunch, as my husband can testify; but, that was the only time I had to get the pie done before our life group.
The crust for this pie is a chocolate wafer crumb crust. It called for 20 chocolate wafers, some brown sugar and some butter all mixed up in my handy food processor. The preparation of the crust was really a cinch, just mix, press in the pan and done!

The filling was another story. Let me just say that I look forward to pies where I get the filling ready without the stove. This recipe called for a double boiler and I have not yet purchased a double boiler, so, I had to improvise again. So, I filled up the pasta pan we had and put in a little stainless silver bowl to float in the water. I put the milk and white chocolate chips in it and then played the waiting game. (Remember I have an hour to do all of this... so yeah, the waiting game is more like torture) Finally the white chocolate chips started melting and it was time to take the floating bowl out of the boiling water. Well neither I, nor my hubby, knew how to get the bowl out. My hubby tried getting it out with some tongs and he tipped it over into the water. Now the main part of the filling was ruined, diluted in the water. We were running out of time and we needed to make another batch super quick. WAIT! We do not have enough white chocolate chips left, oh no. So, hubby ran to the store to get some more chips. Needless to say, I was a little stressed. When he got back from the store we got it going again and this time he successfully got the bowl out without getting any water in it or spilling any of it out.
After that little fiasco, we moved on to the next step of the filling which was whipping everything together. I only have a handheld beater and it takes a while to whip something. I dream that someday I will have a standalone mixer like the pros, hint hint. I whipped, and whipped and whipped it good; finally after about 10 minutes it finally got to the consistency that I was looking for: peaking. I added the vanilla at the end and wah-la the filling was done.

Now that the filling was done, I reached for the pie crust and then realized that I had skipped a step. I forgot to put the crust in the fridge to cool! So, I put the crust in the freezer for about 10 minutes to cool it down quickly. While the crust was in the freezer I made the raspberry sauce which was really pretty easy with my food processor. (You know, I know I should give my food processor a name, any suggestions?) The recipe for the raspberry sauce was frozen raspberries with no syrup, sugar and some lemon. I blended all the ingredients together and there you go, raspberry sauce, and it was yummy.
Once the pie crust was cold, I put the filling in the pie and then sent the pie off to freezerland for about 5 hours.

We stopped at the store on the way to our life group to buy some fresh raspberries for garnish which added a lot of flavor. As we were getting ready to serve the pie we noticed it was not frozen all the way through. In retrospect, I should have done this the night before so the pie could have frozen overnight. Here is the final product and it tasted just as good as it looks.

Hello Results: Due to the debacle with the rigged double boiler we wound of purchasing a real one so we don’t have that problem again. I will not try to make a pie hours before I need it. I also started Weight Watchers so I am going to start putting points on my pies for those of you that might wonder. This pie with the sauce was 14 points a slice, and worth every point! The number is getting lower!! 292 to go!
Wednesday, April 6, 2011
Pie #8: Classic Chocolate Cream Pie
I chose to make a pie for a life group that I attend each week since it was my week to bring sweets. I thought it would be a great opportunity to share a pie! My next pie to make was Classic Chocolate Cream Pie, doesn’t that just sound yummy? When I hear the words “chocolate” and “pie”, I think of my Mammaw because she used to make the BEST chocolate pie. So, I was nervous before I even started making this pie because I doubted this one could live up to the memories I had of her pies…
I was really tired when I started making this pie so I knew I would need some help. I asked my husband, Joshua, to be my sous-chef for this pie. Thankfully, he was happy to help, thanks babe!
The pie called for an Oreo pie crust, which is just smashed up Oreos and butter. Joshua did a great job in assembling this pie crust. He can smash things real well, like the Hulk… “Hulk Smash!” he says…

While my helper was working on the pie crust, I began to get the ingredients ready. As I was getting everything in order I came to the egg part. On a side note, we only had 5 eggs in the house and the recipe called for 4 egg YOLKS. When I read this I saw 4 egg WHITES since that’s what the recipes have been calling for lately. So, the first egg yolk I dumped right into the sink and Joshua was asking me what I was doing. Now, as the “head chef”, I thought to myself “I know you are not watching me make my pies, and don’t even think about telling me what I’m doing wrong!” So, I looked at him and said, “What? I am getting the egg whites!” Joshua gave a weird look and then said, “Umm, you might want to look at the recipe again…” Well, yeah, it called for 4 egg YOLKS not egg whites… So, I guess I’m lucky that Joshua caught that; it might have made a world of difference on how the pie turned out.
After the Oreo crust set in the freezer, we put it in the oven for a few minutes. When the time was up I was getting it out of the oven and I said, “No worries I got it!” Well, while taking the pie pan out of the oven IT SLIPPED from my hands, I did not drop it; but, it was a CLOSE call for sure.
I have noticed in my pie making journey that if it requires anything to be cooked on the stove for some reason I become a little nervous. I’m not sure why, maybe it’s all the stirring till you get the right consistency, and not knowing what I’m looking for that can be a tad bit nerve racking. So, while the pie crust was cooling we worked on the filling. I was so glad Joshua was there to help with the stirring part; it became quite difficult as the filling got thicker. The filling was supposed to take 5-7 minutes to melt on the stove. Well, five minutes past and then seven minutes passed and the filling took about fifteen minutes to get to the consistency that we needed. Once we got the cream consistency we were looking for, we had to work fast. We took the sauce pan off the burner and Joshua continued to stir as I added the rest of the ingredients. The filling got thick pretty fast, which is a good thing because that is what we were looking for.

After pouring the filling into the pie crust, the recipe said to cover the pie filling with a non-stick plastic cover to block out all the air. So, we used Glad Wrap Press and Seal and the first attempt to cover the pie did not work out very well; thankfully there was enough to try it one more time which seemed to work. After wrapping the pie we needed to let it cool again. So, I left it out for a while and then put in the refrigerator to let it set overnight.
After letting the pie set all night, during lunch the next day we checked the pie. Taking off the Press and Seal stuff the condensation that accumulated from the pie fell on the top of the pie. With Joshua’s quick thinking we got a paper towel and tipped the pie up on one end and used the paper towel to soak up the water. I started to wonder why it did that. Did the pie need to cool more before putting it in the fridge to cool over night? Should we have pushed down the cling film to the filling part so there would be no air (suggestion from my Mom)? But, if we did that, they when taking off the plastic wrap wouldn’t you lose some of the filling? I even called my Granny, she suggested using a non-stick foil next time and see if that helps. To this day, I still don’t know what I could have done differently. But, I will say this, next time the recipe calls for covering the filling I am going to recall what happened here and try something different. I am open to ideas, if you have any on this.
Per instructions from the Ken Haedrich book “Pie”, it is best not to do the topping till right before serving. So, just before leaving for our life group, where we were taking the pie, I made the topping. It consists of powder sugar and heavy whipping cream. It was easy to make and it turned out really good. I think next time I am going to decorate it in some way using the pastry piping thingy, I think that would be a nice touch.

I was really tired when I started making this pie so I knew I would need some help. I asked my husband, Joshua, to be my sous-chef for this pie. Thankfully, he was happy to help, thanks babe!
The pie called for an Oreo pie crust, which is just smashed up Oreos and butter. Joshua did a great job in assembling this pie crust. He can smash things real well, like the Hulk… “Hulk Smash!” he says…

While my helper was working on the pie crust, I began to get the ingredients ready. As I was getting everything in order I came to the egg part. On a side note, we only had 5 eggs in the house and the recipe called for 4 egg YOLKS. When I read this I saw 4 egg WHITES since that’s what the recipes have been calling for lately. So, the first egg yolk I dumped right into the sink and Joshua was asking me what I was doing. Now, as the “head chef”, I thought to myself “I know you are not watching me make my pies, and don’t even think about telling me what I’m doing wrong!” So, I looked at him and said, “What? I am getting the egg whites!” Joshua gave a weird look and then said, “Umm, you might want to look at the recipe again…” Well, yeah, it called for 4 egg YOLKS not egg whites… So, I guess I’m lucky that Joshua caught that; it might have made a world of difference on how the pie turned out.
After the Oreo crust set in the freezer, we put it in the oven for a few minutes. When the time was up I was getting it out of the oven and I said, “No worries I got it!” Well, while taking the pie pan out of the oven IT SLIPPED from my hands, I did not drop it; but, it was a CLOSE call for sure.
I have noticed in my pie making journey that if it requires anything to be cooked on the stove for some reason I become a little nervous. I’m not sure why, maybe it’s all the stirring till you get the right consistency, and not knowing what I’m looking for that can be a tad bit nerve racking. So, while the pie crust was cooling we worked on the filling. I was so glad Joshua was there to help with the stirring part; it became quite difficult as the filling got thicker. The filling was supposed to take 5-7 minutes to melt on the stove. Well, five minutes past and then seven minutes passed and the filling took about fifteen minutes to get to the consistency that we needed. Once we got the cream consistency we were looking for, we had to work fast. We took the sauce pan off the burner and Joshua continued to stir as I added the rest of the ingredients. The filling got thick pretty fast, which is a good thing because that is what we were looking for.

After pouring the filling into the pie crust, the recipe said to cover the pie filling with a non-stick plastic cover to block out all the air. So, we used Glad Wrap Press and Seal and the first attempt to cover the pie did not work out very well; thankfully there was enough to try it one more time which seemed to work. After wrapping the pie we needed to let it cool again. So, I left it out for a while and then put in the refrigerator to let it set overnight.
After letting the pie set all night, during lunch the next day we checked the pie. Taking off the Press and Seal stuff the condensation that accumulated from the pie fell on the top of the pie. With Joshua’s quick thinking we got a paper towel and tipped the pie up on one end and used the paper towel to soak up the water. I started to wonder why it did that. Did the pie need to cool more before putting it in the fridge to cool over night? Should we have pushed down the cling film to the filling part so there would be no air (suggestion from my Mom)? But, if we did that, they when taking off the plastic wrap wouldn’t you lose some of the filling? I even called my Granny, she suggested using a non-stick foil next time and see if that helps. To this day, I still don’t know what I could have done differently. But, I will say this, next time the recipe calls for covering the filling I am going to recall what happened here and try something different. I am open to ideas, if you have any on this.
Per instructions from the Ken Haedrich book “Pie”, it is best not to do the topping till right before serving. So, just before leaving for our life group, where we were taking the pie, I made the topping. It consists of powder sugar and heavy whipping cream. It was easy to make and it turned out really good. I think next time I am going to decorate it in some way using the pastry piping thingy, I think that would be a nice touch.

Hello Results: Everyone loved the pie! It had just the right texture and was a hit! Even my kids loved it. I would love to figure out the plastic wrap vs. non-stick foil issue before I bake another pie like this. I need to make sure to not start a pie when I am already beat. It is great to know I have a wonderful sous-chef to help me! As for how it compared to my Mammaw’s pie, hers had a meringue topping and was baked (obviously a different pie) and this one was whipped and no-bake. I don’t completely remember what hers used to taste like but it made me feel closer to her and brought back wonderful memories. I miss you Mammaw! Only 292 to go! I love seeing that number go down.
Sunday, March 27, 2011
Pie #7: Little No Bake Butter Finger Pie
One thing that strikes me as interesting about this “no bake” pie is the first instruction you read is to bake the pie…what’s up with that? So when I read that this pie would be a “no bake pie” I thought there would be no baking required, well, I was wrong. The little pies needed to be baked for five minutes and cooled before the filling could be put into the pies. Why do I say pies? This particular recipe called for little individual pie crusts, the kind you buy from the store all ready to go.
When going over the instructions for the pies I noticed that the recipe called for ½ cup of smooth peanut butter. Being that I am not the biggest fan of peanut butter I was not thrilled to see there would be that much peanut butter in it. I made a decision at the beginning of this pie journey that I would follow the directions to a “t”, so although I thought that a half of cup of PB was way too much, but what do I know, so I put in the ½ a cup of PB it called for. As I read on, I realized that the recipe also calls for an entire package of cream cheese which always seems to make everything okay. I love cream cheese, don’t you?
As I was wrapping up and putting away all of the ingredients for the pies, I read ahead and noticed that the pies were supposed to be in the fridge chilling… oops. So, I made the call to put the pie crusts in the freezer so it would allow the pies to chill faster in the amount of time I had left. I have learned when the recipe calls for something to be chilled, and you do not remember to do so, just stick the ingredients in the freezer for a few minutes and there you go… CHILLED!
I crushed one Butterfinger bar in our granite mortar and pestle grinder, or “medicine crusher” as I like to call it. This made for some nice little crumbs of Butterfinger.

After mixing all of the ingredients that the recipe called for I put some in each of my pie crusts. I had to make sure they were filled to the top and top them off with crushed Butterfinger candy.

After filling each pie and letting them set for at least 3 hours, it was time for topping. I whipped up some whipping cream till it became the consistency of whip cream. The flavor of the whipped cream was okay, not too good by itself, but it tasted great on top of the individual pies.
In the end pies turned out really well. I liked the combination of peanut butter and cream cheese and the constancy of the pies reminded me of custard and they even looked like custard pies, but it was not even close to tasting like it…

I made a total of 6 individual pies. Two of them I gave to our neighbor, one Joshua and I ate, and the other three pies I took to our friends the Fisher’s house.
Hello Results: I will say it was a lot of work for a no bake pie, just sayin... I liked the balance of peanut butter and cream cheese and the crunch the Butterfinger gave the pies. I will say the whipped cream needed something added to it for more flavor, like powdered sugar or something similar. Over all, a hit! 293 pies to go!
When going over the instructions for the pies I noticed that the recipe called for ½ cup of smooth peanut butter. Being that I am not the biggest fan of peanut butter I was not thrilled to see there would be that much peanut butter in it. I made a decision at the beginning of this pie journey that I would follow the directions to a “t”, so although I thought that a half of cup of PB was way too much, but what do I know, so I put in the ½ a cup of PB it called for. As I read on, I realized that the recipe also calls for an entire package of cream cheese which always seems to make everything okay. I love cream cheese, don’t you?
As I was wrapping up and putting away all of the ingredients for the pies, I read ahead and noticed that the pies were supposed to be in the fridge chilling… oops. So, I made the call to put the pie crusts in the freezer so it would allow the pies to chill faster in the amount of time I had left. I have learned when the recipe calls for something to be chilled, and you do not remember to do so, just stick the ingredients in the freezer for a few minutes and there you go… CHILLED!
I crushed one Butterfinger bar in our granite mortar and pestle grinder, or “medicine crusher” as I like to call it. This made for some nice little crumbs of Butterfinger.

After mixing all of the ingredients that the recipe called for I put some in each of my pie crusts. I had to make sure they were filled to the top and top them off with crushed Butterfinger candy.

After filling each pie and letting them set for at least 3 hours, it was time for topping. I whipped up some whipping cream till it became the consistency of whip cream. The flavor of the whipped cream was okay, not too good by itself, but it tasted great on top of the individual pies.
In the end pies turned out really well. I liked the combination of peanut butter and cream cheese and the constancy of the pies reminded me of custard and they even looked like custard pies, but it was not even close to tasting like it…

I made a total of 6 individual pies. Two of them I gave to our neighbor, one Joshua and I ate, and the other three pies I took to our friends the Fisher’s house.
Hello Results: I will say it was a lot of work for a no bake pie, just sayin... I liked the balance of peanut butter and cream cheese and the crunch the Butterfinger gave the pies. I will say the whipped cream needed something added to it for more flavor, like powdered sugar or something similar. Over all, a hit! 293 pies to go!
Saturday, February 19, 2011
Pie #6: Louisiana Brown Butter Pecan Pie
Man, just the sound of this pie sounds good.
Let me preface this blog by saying that while I was making this particular pie, I was also making lunch for me and a separate lunch for the boys. I had many things going on all at once and I knew that it would be crazy; but, I know now not to attempt that again. Things seemed really rushed, but no worries, the pie turned out great.
This time I used the food processor for making the pie crust, to save time. In the mist of the craziness I skipped a step when adding ingredients to the food processor. Per the book “Pie” by Ken Haedrich, you are supposed to put in the flour, sugar and salt and then mix and then fluff. Then add the butter and then fluff again. Well… I missed that last part. I put the shortening in first then the butter. I am not sure it made a difference; but, I did notice there were clumps of butter when getting the dough ready to set. Note to self: Follow directions exactly and don’t skip steps.
This was yet another prebake pie crust but since I just did one a few days ago it was fresh on my mind and I knew what needed to be done. Except one step… there is one last step that is very important that I did not follow to a “T”. When you take the prebaked pie crust out of the oven after cooking it for 20 minutes, you are supposed to cover just the holes with egg whites. Well, I was in a hurry so I covered the entire crust with egg whites. You might wonder what the big deal is but you will find out later.
Now, the biggest part of this pie was browning the butter. You need a shiny pan to do this, so, I had to order a shiny pan first. The “special” shiny pan is supposed to make it easier to tell the color of the butter as it browns, it's harder to tell how it's doing in a dark pan. Browning the butter was an important step, and if you mess that up it will mess up the whole pie. I don’t know about you, but I have never browned butter before. They are right that once the browning starts you have to work FAST. I am happy to report that my first attempt to brown butter was a success. After browning the butter I set it aside to let it cool. I then added all the ingredients to it and then ran into a hiccup. It called for 1/8 teaspoon of vanilla extract. I did not know they made that little of a measuring spoon. So, thanks to the advice of my Mom, I just filled the 1/4 teaspoon halfway and there you have it, 1/8 teaspoon. Who knew you would get a math lesson from me. I finished making the filling, and boy did it smell good!

The pie took a little longer to cook than it said it would, maybe 10 minutes more. Per the book, the filling should crack at the sides and puff a little at the top. Looks like it turned out just right.

After letting it set for over two hours, Joshua cut the pie and it was hard to cut. Of course, me being the “crust master” that I am [sarcastic], I just knew he was cutting it wrong. If you recall, earlier in this blog I talk about adding the egg whites to the entire crust, well yeah, the egg whites made the crust a “little” tough to cut. Lesson learned with that little oops.

Hello Results: Over all, it turned out really great. It tasted a little “sticky” because of the egg whites on the crust. So, don’t be in a hurry when making the crust. Try not to make a lunch for yourself and two hungry toddlers at the same time. Buy a 1/8 teaspoon measuring spoon. 294 to go!
Monday, February 14, 2011
Pie #5: Classic Chess Pie
For the Super Bowl I decided to make a pie, Classic Chess Pie. So, what is a chess pie?
According to Google it’s: a pie filled with a rich mixture of eggs, butter, and sugar, often with additional flavorings. In this case, lemon is the extra flavor.
The start of the crust went easy. I decided to forego the food processor this time and make the crust all by hand. The dough turned out great, although I had to roll it out twice. It turned out to be just the right amount of crust and I only had a little piece left over. Usually, I have a lot of scraps left.

Now prebaking the pie crust was another story. There are several steps to follow to prebake a pie. First, I had to put the pie in the freezer for 15 minutes. Then after that I had to make a foil mold of the pie and but beans in the foil. The beans act as a weight to weigh down the crust so it does not puff up. It called for beans to fill the pie plate completely, but I did not have enough beans, so I just made do with what I had.

After 15 minutes I had to take the beans and foil off and then poke holes in the bottom of the crust and cook for another 20 minutes. During this time I missed a key part. You were supposed to check on the pie during this 20 minutes and I did not. So I pulled the pie out of the oven and it was a little puffy. To fix this, it suggests taking the back of a spoon and push down the crust without breaking it. I did it and that seemed to help. I then had to break an egg to get the egg white and thankful I have an egg white separator, and then put the egg whites over ONLY the holes you made and then bake that for another 2 minutes.
I will say right now I’m not the biggest fan of prebaking crust. That is one thing I will have to master.
Finally, I was done with crust and I could work on the filling. By this time I had been working on this pie for a while and was honestly ready to be done. That being said, I looked at the ingredients and noticed that the recipe called for ROOM TEMPATURE butter. Well yeah, my butter was in the fridge. So what now? Well, I got the amount of butter it called for and put it in a pan and cooked the butter a little bit. I just helped the butter reach “room temperature” faster. Right? I will say I did remember to have the eggs at room temperature, so, I did have that going for me. I had to use the mixer with this pie. This was the first time for me to use a mixer on this pie journey. It was interesting. I could not figure out what speeds I needed and thankfully my hubby was there to come to my rescue and help me figure out what speed my mixer needed to be at.
As I was putting the ingredients into the mixer, Joshua, my husband, noticed that there was a lot of lemon zest. So he asked me, “How much of the lemon did you zest?” I replied quickly, “Till I saw the lemon part.” EKK… I should not have done that! Way to much lemon zest. Apparently I am supposed to zest only the skin. OOPS!

The filling turned out pretty good and looked great.

Hello Results: Don’t pick Super Bowl Night to make a pie. Make sure you have enough beans to weigh down the pie crust. Ease up on the zesting of the lemon. If I see the inside of the lemon I have gone TOO far. I did order a Lemon Zester but still do not have it; but, I will use lemon zester next time. Overall, not my favorite tasting pie but that might be because of too much lemon. That makes five pies, so … countdown please… 295 to go!

Sunday, January 30, 2011
Pie #4: All Pear Pie with Maple and Candied Ginger
When some people here “All Pear Pie”, some people think “Wow that sounds awesome!”, while other might think “Pears in a pie, hum, that’s interesting.”; but I think “Pears in a pie, why not!” Pie four was yet again an interesting venture, and I love that with each pie there is something new to learn.
I should call the title of the pie “All Pear Pie with Brown Sugar and Ginger” because instead of using maple I used light brown sugar and instead of using candied ginger I used a ginger spice. All the measurements worked out well this time and the pie pan was the right size for it. I think unless it asks for a larger one, I am going to stick to my 9 1/2 in. pie pan. This pie did seem a little rushed for me and I could not figure out why, but after making it I figured out why. I usually get my ingredients ready before I even start preparing the pie, but this time I didn’t. I just did a ‘prepare as you go’ kind of thing. To be honest I was not a fan of that, so lesson learned there. This pie was not as relaxing to make because of that, but I still loved it.
So the first question I had, not being an avid pear fan, was what kind of pears to use. Apparently you want to use green ripe ones. I do not remember ever cutting a pear so it was interesting to see that they have a really small core. So let me ask you this, do you know how many pears equal 7 cups of sliced pears? I did not have a clue how many I would need, so, I got about 7 pears ready for the food processor. After slicing 6 1/2 pears and having an almost full food processor bowl I stopped slicing and measured it out to be about 8 cups (A side note, if you want thicker slices when using the food processor, you need to push what you’re chopping through fast because it will make a thicker cut). So, factoring in the air space that should equal the 7 cups I needed. The pears started to turn brown after slicing so I started to freak out. Joshua saved the day by suggesting putting some lemon juice on them. I did not want to because I did not read that in the recipe yet (Another side note, right now I follow the recipes to the T, no skipping over steps and I go in order.) That idea drove me a little crazy but I did it, and of course, the pears stopped turning brown. Yeah, thanks Joshua.

While putting all of the ingredients in, I learned that it is very difficult, if not impossible, to zest a lemon that has been already cut. Joshua assisted me on the lemon zest, and we had to improvise because we did not have a zester. He had to use a small grader and that took him forever just to get a little lemon zest. Also, right after making the filling I looked at my fingernail and noticed my red nail polished was chipped. Eek! I did check the filling thoroughly and I did not find it. I hope it just washed it off into the sink…

The crust turned out great, and this will be the fifth time I’ve had to make the “Basic Flakey Crust”. I have actually got the hang of it, so this time I decided to try the top crust that Ken Haedrick calls “Lattice Top Pie”. I thought the directions that Ken gave were great, along with illustrations to help you visualize what you’re looking for. I will say that I was very nervous to do this because the crust looked overwhelming. As I said earlier, I did not read ahead this time so I ran yet again into another hick-up. I made sure the crust was rolled in a circle and ready like I have with all the other pies. Well guess what, the first thing it said was not to roll it into a circle, but a rectangle instead. Great… so, I franticly rolled it out into a “rectangle”, well close to one at least. Then there were at least four lines in the book about how to get the right measurements, and I totally did not get it. Thankfully at the end of the instructions it had language that I could get, “make sure there are at least eight strips”, got it! Were the strips even? Not even close, but I figured next time I could use the edge of a measuring board for a straighter edge. Now, after all that, I finally finished the crust and the pie was ready to go in the oven.

After cooking the pie 30 minutes, I turned the oven down and turned the pie 180° so the pie would brown evenly, and cooked it for an additional 35 minutes. After that, I took it out and let is set for two hours, the whole 2 hours.


This is a picture of my friend Jane who joined Joshua and me for the first taste of the “All Pear Pie”.

Next pie for me will be the “Louisiana Browned- Butter Pecan Pie”. Yummo!
Hello Results: Although I am not a fan of pears, it was a great pie. It looked great, and I am glad that I tried the “Lattice Top Pie” crust because it sure did look and taste great. I must prepare ingredients before I start making the pie so I don't feel so rushed. Lemon keep the pears from turning brown and I need to order a lemon zester. That makes four pies, so only 296 to go!
Hello Extra: I am not counting this as a "pie", but the same day I made the “All Pear Pie” I also made this chicken pot pie from scratch, crust and all. It was SO yummy!


Wednesday, January 26, 2011
Pie #3: The Easiest Apple Pie
When I hear the words Easiest Apple Pie I think it would take just a few minutes to prepare and then pop in the oven and, ta-dah, it’s done... well that was the case, for the most part.
My son Tyler, who is almost 4 years old, helped me with most of this pie. We first rolled out the store bought crust and put it in a 9 inch pie pan then popped it in the freezer. While the crust was in the freezer, Tyler and I worked on the filling. I have noticed that each of the recipes, so far, ask you to freeze the crust for 15 minutes while you are working on the filling. The recipe called for a tablespoon of freshly squeezed lemon juice. So while squeezing the lemon for the tablespoon of lemon juice, I told Tyler to cover his eyes, in a joking matter, and wouldn’t you know it the lemon juice squirted right in his eye. At first he just laughed so I thought it missed his eye, but within seconds he felt the sting of lemon juice in his eye and he was not happy at all. After he recovered, we continued to mix in the ingredients of 1 chopped apple, a can and a half of apple filling, sugar, raisins and cinnamon. We put in the filling in the crust from the freeze and then I put the pie in the oven. I will say, although the recipe called for a 9 inch pie pan, I would recommend using a 9 ½ inch pie pan. I followed the recipe to the T and the filling still seemed to be packed too full, without the top crumb crust.


While the pie was cooking it was time to do the topping. The topping was a crumb topping which I am finding are not that hard to make. The key to a good crumb topping is to not over-process the flour, sugar and butter. I guess I got a little too food processing happy and processed it for too long. By doing that it caused the crumbs to be too “crumby”. After the pie cooked for about 30 minutes it was time for the crust. I poured the crust on the pie and knew that the pie might not turn out like I had planned. When looking at the crust you could not tell it was supposed to be a crumb crust; but, It looked like someone just dumped a mixture of sugar and flour on top of it. I was almost sure the pie would boil over.


After waiting the required time of 25 minutes, with no boil over, I tried to take the pie out and here is where pie handles on the pan would come in handy. I did not have much to grab onto, so yeah… the pie almost fell, but I caught it at the cost of cracked and messing up the pie crust. So unless I can’t avoid it, I will be using pie pans with handles to avoid that from happening again. The crust was nowhere near being done, so I put it back in the oven for another 10 minutes, then another 10 minutes and then again for for 10 minutes. After about 30 minutes of extra cooking time to get the crust done, while being positive the bottom crust would be toast, I called it quits on the pie and took it out to cool.
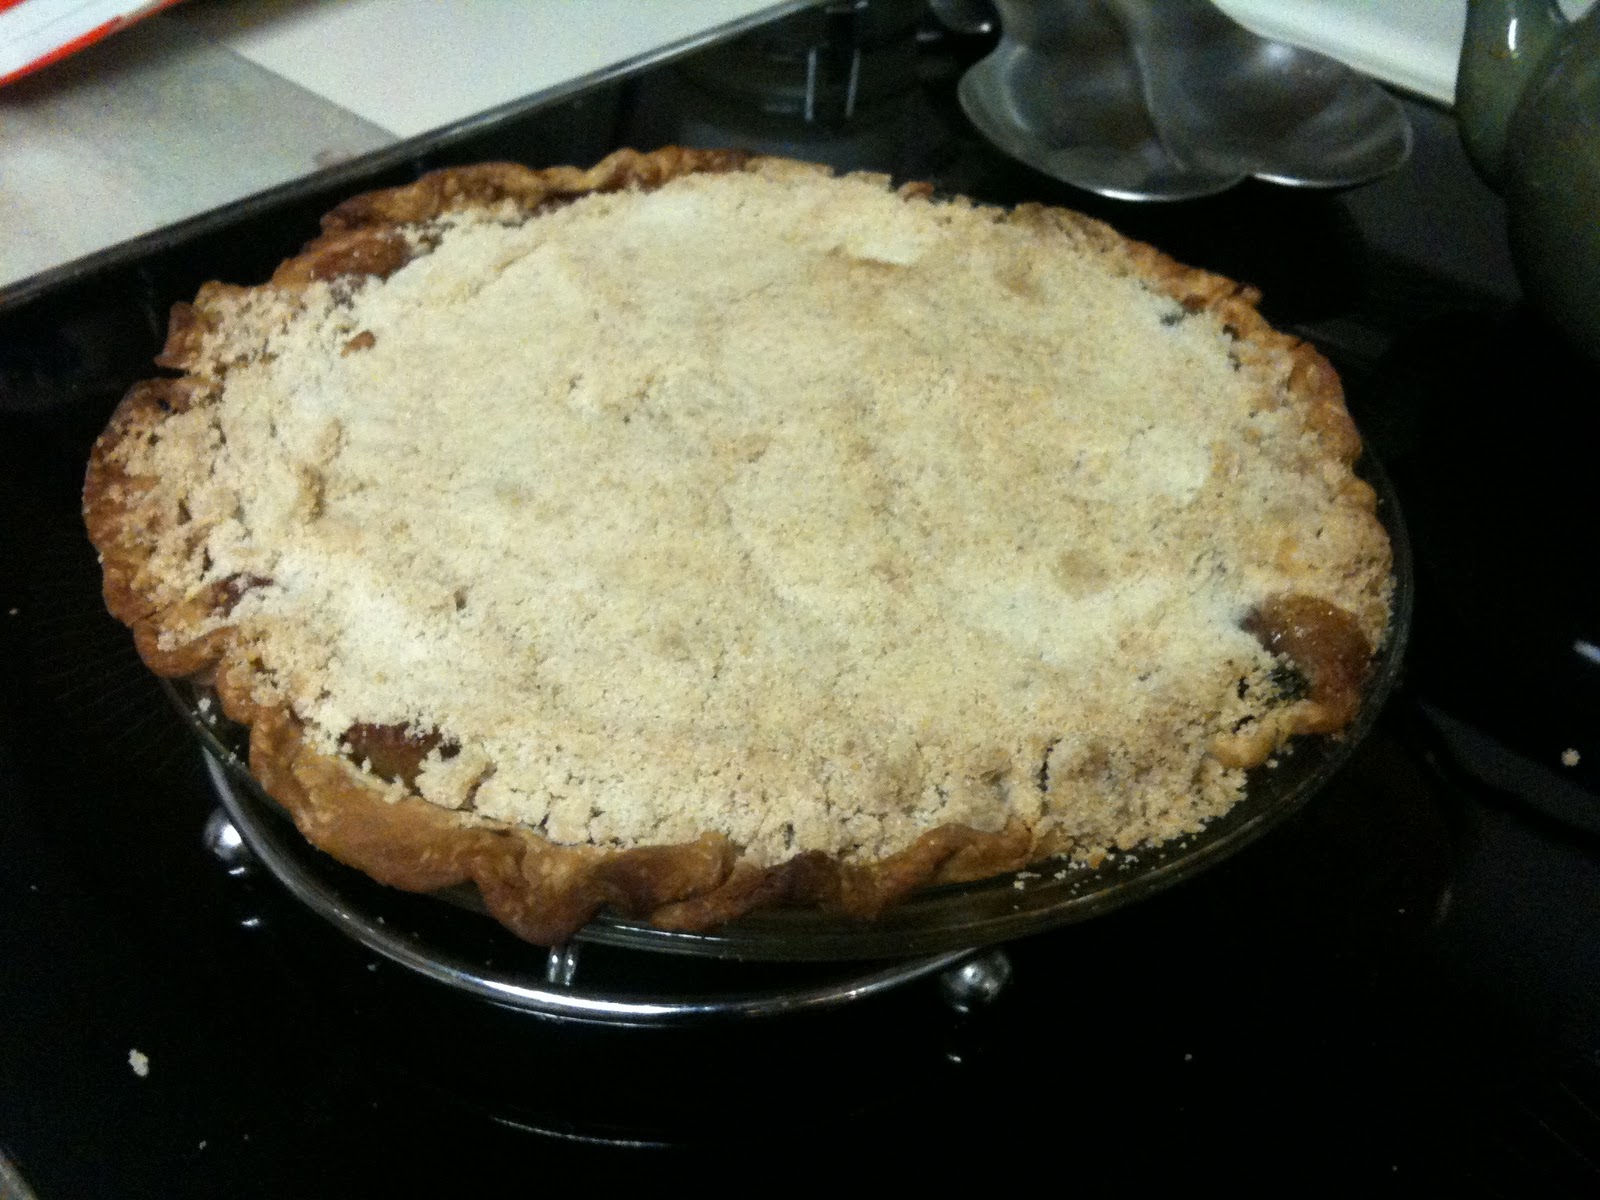
The pie only had to set one for an hour instead of two, so we made the hour mark. It turned out to taste really good. The crust was okay, but not one of my best pies for sure. An interesting side note, if you use pie filling in a pie you do not have to let the pie set as long due to the thickness of the pie filling.

Hello Results: Even if it has the word “easy” in the title of the pie, don’t let it fool you. Don’t over process crumb crust and use a pie pan with handles. I think it would be a good idea to invest in some safety glasses for the fresh juice requirements of pies. I loved spending time with my son and look forward to all the times he will be able to help! Oh, and on second helping it turned out to be ever better cold! That makes three pies! Only 297 to go.
Thursday, January 13, 2011
Pie #2: All Strawberry Pie
I have finally figured out how I am going to choose the order of pies I will cook in this book. Ken Haedrich has broken the “Pie” book into 10 different categories of pies and I am going to do the first pie from each category and then repeat categories doing each pie in sequential order.
That being said, I introduce you to the All Strawberry Pie from the “Berry Good Pies” category. Let me tell you, that is a great name for this category of pies because they do sound berry berry good!
Upon reading the recipe I found that this particular pie calls for “mint oil”. Yeah, um, do you know what that is? I sure didn’t, so I went to the store assuming I could just buy it. To my surprise and disappointment you could not. I had to make it. So, here I am an hour before I even start the crust (that has to set for an hour) and I am making mint oil. “How?”, you ask. Well, I put some water in a big pot and then put a small metal bowl in the pot with chopped mint and olive oil. Once brought to a boil I turned down the heat and let it simmer for about an hour. Then I drained the oil and strained the mint, and there you have it, mint oil.

Now, with the mint oil out of the way, on to the dough, only this time I have to make a double crust! I used my food processer this time and it worked great. It was much quicker, but I had to work faster with the dough. The bottom crust turned out great, but while making the top crust I tried to roll it out on wax paper (I now would not suggest that) and it stuck like glue. So while I was trying to put on the top crust it fell apart, luckily I saved it with some quick thinking and cold water. I also used the slicer blade on my processer and the strawberries turned out great, it looks like a pro did it if you ask me.

So the filling smelled and tasted great, even before I put it in the oven to bake. Before I put the top crust on I used my new Pie Vent Bird and it worked out great. Oh, a pie bird is something you put in the middle of the bottom crust, fill in the pie, and put the top crust on around it to create a hole to allow for the air to vent out of the bird instead of the crust, which can cause cracks and spill over. I loved the way it worked!

As I was putting the finishing touches on the crust before putting it in the oven, it has you sprinkle the sugar around the crust and then, get ready for this, sprinkle milk on it. So can you tell me how to sprinkle milk? I had no idea, so I improvised by using a basting brush to fling milk on the pie. Fun! “I fling milk!”
Oh, my first injury of the pie journey is a nice big burn on my arm! This happened as I was turning the pie in the oven, per instructions... Ouch! It hurt.

The crust turned out great! We had to wait for a while for it to cool down. It suggested that you wait for 2 hours, so it was done at 9pm and we’ll need to wait till 11pm for it to set completely. Here is the final product.

Hello Results: Food processor is working out great! Don’t use wax paper. Watch your arm when you turn the pie, or pull out the oven rack first and then turn! We didn’t wait the whole two hours and it didn’t set completely, so I need to have patience and let it set long enough. But it tastes awesome, and the mint adds an interesting twist on the flavor! Two pies down, 298 to go.

That being said, I introduce you to the All Strawberry Pie from the “Berry Good Pies” category. Let me tell you, that is a great name for this category of pies because they do sound berry berry good!
Upon reading the recipe I found that this particular pie calls for “mint oil”. Yeah, um, do you know what that is? I sure didn’t, so I went to the store assuming I could just buy it. To my surprise and disappointment you could not. I had to make it. So, here I am an hour before I even start the crust (that has to set for an hour) and I am making mint oil. “How?”, you ask. Well, I put some water in a big pot and then put a small metal bowl in the pot with chopped mint and olive oil. Once brought to a boil I turned down the heat and let it simmer for about an hour. Then I drained the oil and strained the mint, and there you have it, mint oil.

Now, with the mint oil out of the way, on to the dough, only this time I have to make a double crust! I used my food processer this time and it worked great. It was much quicker, but I had to work faster with the dough. The bottom crust turned out great, but while making the top crust I tried to roll it out on wax paper (I now would not suggest that) and it stuck like glue. So while I was trying to put on the top crust it fell apart, luckily I saved it with some quick thinking and cold water. I also used the slicer blade on my processer and the strawberries turned out great, it looks like a pro did it if you ask me.

So the filling smelled and tasted great, even before I put it in the oven to bake. Before I put the top crust on I used my new Pie Vent Bird and it worked out great. Oh, a pie bird is something you put in the middle of the bottom crust, fill in the pie, and put the top crust on around it to create a hole to allow for the air to vent out of the bird instead of the crust, which can cause cracks and spill over. I loved the way it worked!

As I was putting the finishing touches on the crust before putting it in the oven, it has you sprinkle the sugar around the crust and then, get ready for this, sprinkle milk on it. So can you tell me how to sprinkle milk? I had no idea, so I improvised by using a basting brush to fling milk on the pie. Fun! “I fling milk!”
Oh, my first injury of the pie journey is a nice big burn on my arm! This happened as I was turning the pie in the oven, per instructions... Ouch! It hurt.


Hello Results: Food processor is working out great! Don’t use wax paper. Watch your arm when you turn the pie, or pull out the oven rack first and then turn! We didn’t wait the whole two hours and it didn’t set completely, so I need to have patience and let it set long enough. But it tastes awesome, and the mint adds an interesting twist on the flavor! Two pies down, 298 to go.

Subscribe to:
Posts (Atom)